Audiobookshelf es un servidor autoalojado para audiolibros y podcasts. Permite gestionar y organizar los podcast o audiolibros en diferentes bibliotecas.
Lo interesante de Audiobookshelf es que permite configurar la biblioteca para que vaya descargando los capítulos de tus podcast favoritos y luego escucharlos haciendo streaming.
Este tutorial lo vamos hacer sobre Debian 12, pero podéis usar otras versiones de GNU/Linux e incluso usar Docker.
Instalación de Audiobookshelf
Lo primero como siempre, actualizaremos el sistema:
apt update
apt upgrade
Instalamos dependencias necesarias:
apt install gnupg curlDescargamos la llave para el repositorio:
wget -O- https://advplyr.github.io/audiobookshelf-ppa/KEY.gpg | gpg --dearmor | sudo tee /etc/apt/trusted.gpg.d/adb-archive-keyring.gpgY configuramos el repositorio:
curl -s -o /etc/apt/sources.list.d/audiobookshelf.list https://advplyr.github.io/audiobookshelf-ppa/audiobookshelf.listActualizamos de nuevo repositorios:
apt update
Finalmente procedemos a instalar el paquete para audiobookshelf:
apt install audiobookshelfConfiguración AudioBookShelf
El servicio Audiobookshelf utilizará el archivo de configuración ubicado en /etc/default/audiobookshelf. La configuración predeterminada es la siguiente:
METADATA_PATH=/usr/share/audiobookshelf/metadata
CONFIG_PATH=/usr/share/audiobookshelf/config
FFMPEG_PATH=/usr/lib/audiobookshelf-ffmpeg/ffmpeg
FFPROBE_PATH=/usr/lib/audiobookshelf-ffmpeg/ffprobe
TONE_PATH=/usr/lib/audiobookshelf-ffmpeg/tone
PORT=13378Para recargar el servicio:
systemctl restart audiobookshelf.service
Configuración inicial
Ahora que el servicio ya está levantado, podremos acceder vía IP del servidor usando el puerto 13378. Al acceder tendremos que configurar un primer usuario:
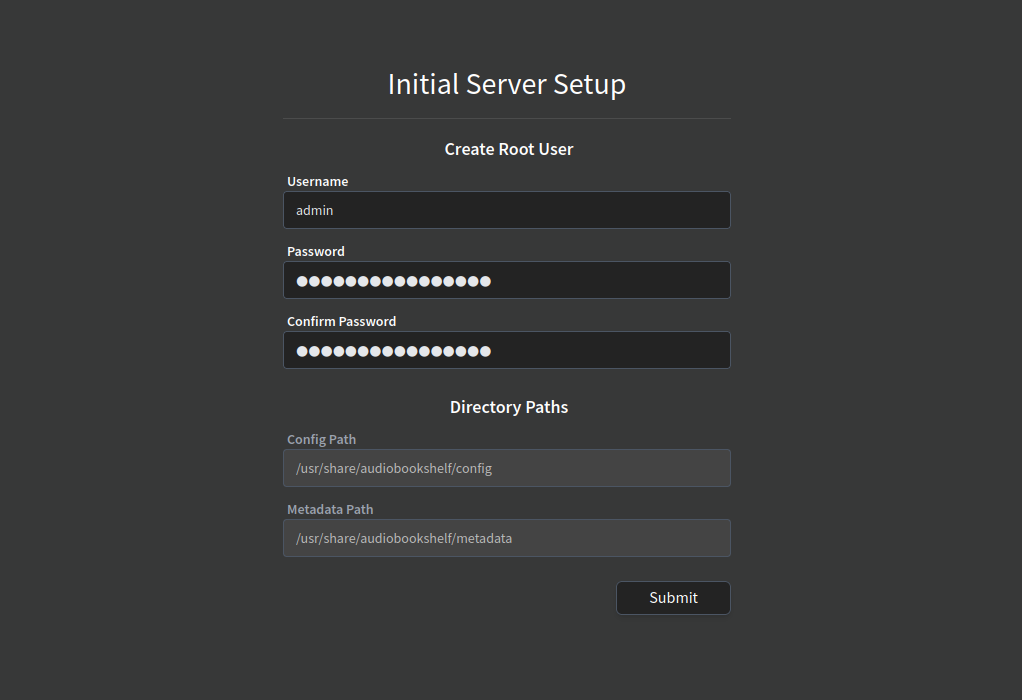
Tras la creación del usuario, deberemos de iniciar sesión de nuevo.
Configuración de Proxy Nginx
Para configurar el Nginx Proxy, primero deberemos de configurar el certificado SSL para ello necesitaremos instalar:
apt install certbotY generaremos el certificado con:
$ certbot certonly

Saving debug log to /var/log/letsencrypt/letsencrypt.log

How would you like to authenticate with the ACME CA?
- - - - - - - - - - - - - - - - - - - - - - - - - - - - - - - - - - - - - - - -
1: Spin up a temporary webserver (standalone)
2: Place files in webroot directory (webroot)
- - - - - - - - - - - - - - - - - - - - - - - - - - - - - - - - - - - - - - - -
Select the appropriate number [1-2] then [enter] (press 'c' to cancel): 1
Please enter the domain name(s) you would like on your certificate (comma and/or
space separated) (Enter 'c' to cancel): [DOMINIO]
Requesting a certificate for [DOMINIO]

Successfully received certificate.
Certificate is saved at: /etc/letsencrypt/live/[DOMINIO]/fullchain.pem
Key is saved at:         /etc/letsencrypt/live/[DOMINIO]/privkey.pem
This certificate expires on 2024-02-28.
These files will be updated when the certificate renews.
Certbot has set up a scheduled task to automatically renew this certificate in the background.
We were unable to subscribe you the EFF mailing list because your e-mail address appears to be invalid. You can try again later by visiting https://act.eff.org.Una vez generado el certificado, configuramos el fichero de configuración de Nginx:
server {
        listen 443 ssl;
        server_name [DOMINIO];

        access_log /var/log/nginx/audiobookshelf.access.log;
        error_log /var/log/nginx/audiobookshelf.error.log;

        ssl_certificate         /etc/letsencrypt/live/[DOMINIO]/fullchain.pem;
        ssl_certificate_key     /etc/letsencrypt/live/[DOMINIO]/privkey.pem;

        location / {
                     proxy_set_header X-Forwarded-For    $proxy_add_x_forwarded_for;
                     proxy_set_header  X-Forwarded-Proto $scheme;
                     proxy_set_header  Host              $host;
                     proxy_set_header Upgrade            $http_upgrade;
                     proxy_set_header Connection         "upgrade";

                     proxy_http_version                  1.1;

                     proxy_pass                          http://localhost:13378;
                     proxy_redirect                      http:// https://;
                   }
}
Recargamos la configuración de Nginx:
systemctl reload nginxY ya deberíamos de poder acceder usando dominio.
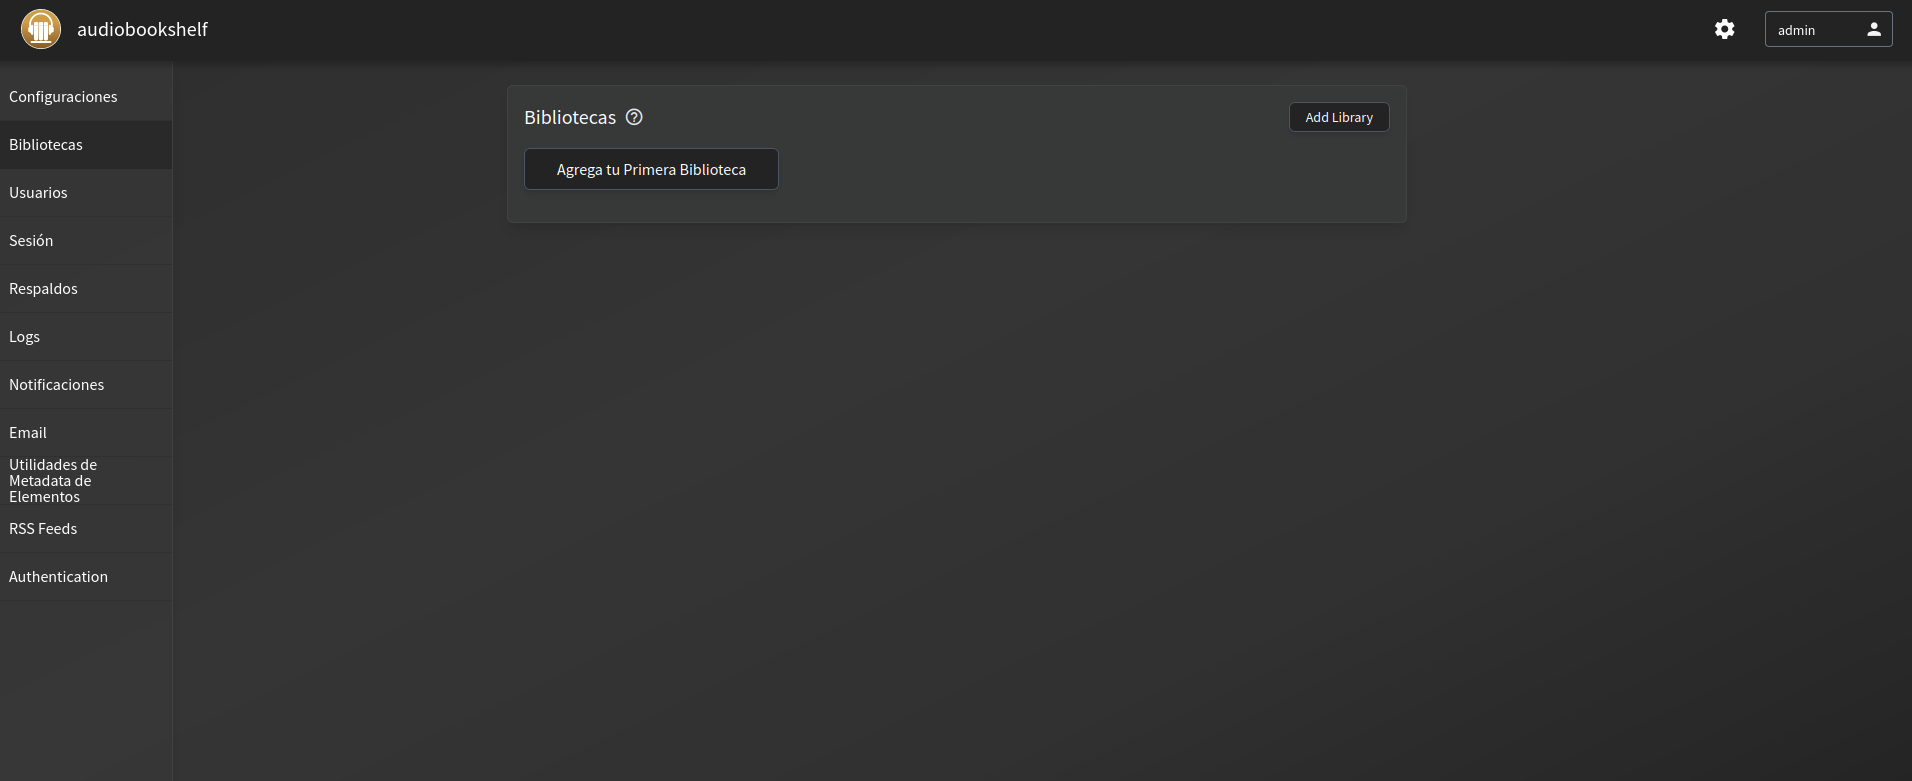
Ahora ya deberíamos de crear nuestras bibliotecas e importar nuestros podcast o audiolibros favoritos.
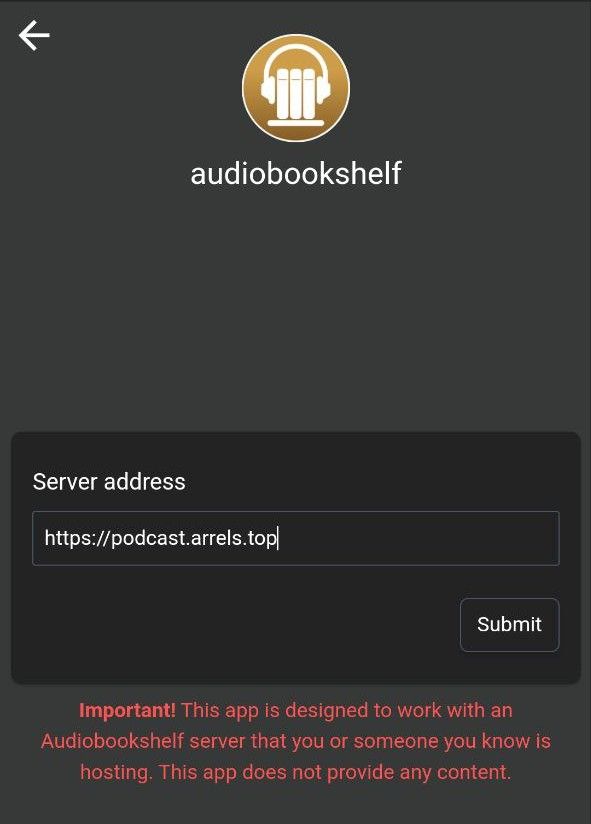
Configuración en APP de Android
Desde la APP podremos configurar nuestro servidor, para ello nada más abrirla deberemos de introducir nuestro dominio:
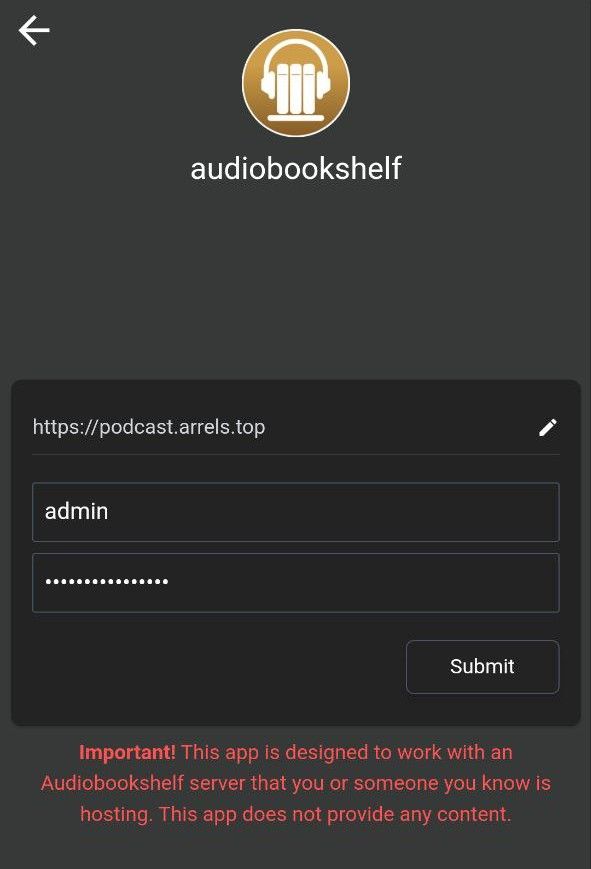
Y luego iniciar sesión con nuestro usuario:


Comentarios