MySQL es uno de los sistemas de gestión de bases de datos más utilizados y más popular. Utiliza el concepto de bases de datos relacionales y tiene una arquitectura cliente/servidor. Se puede instalar en diferentes distribuciones de GNU/Linux.
Algunas aplicaciones web que utilizamos ya están pidiendo que la versión de MySQL sea la 8 en vez de la 5.x. Es por eso que hoy vamos a realizar la instalación de MySQL 8.0 en Ubuntu 20.04 y para ello es necesario hacerlo a través de un repositorio externo.
Instalación de MySQL
Lo primero será añadir el repositorio, descargamos el siguiente paquete:
wget https://dev.mysql.com/get/mysql-apt-config_0.8.22-1_all.debLo instalamos:
sudo dpkg -i mysql-apt-config_0.8.22-1_all.deb
Seleccionamos la primera opción y le damos a Ok.
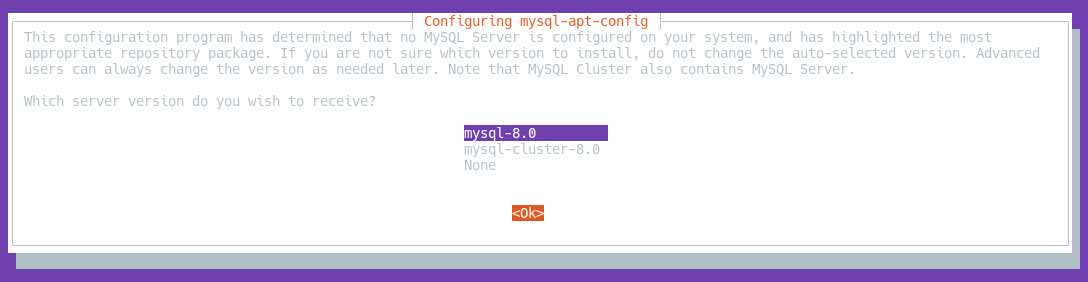
Seleccionamos la opción de mysql-8.0 y le damos a Ok. En la siguiente opción, mascamos la opción Ok.
Tras instalar el paquete, actualizamos los repositorios:
apt updateLuego instalamos los paquetes necesarios:
apt install mysql-client mysql-community-server mysql-serverDurante la instalación nos aparecerá lo siguiente:
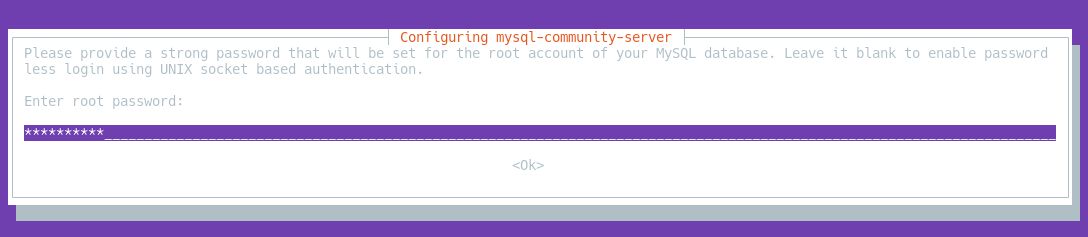
Configuramos una contraseña segura para el usuario root en el MySQL.
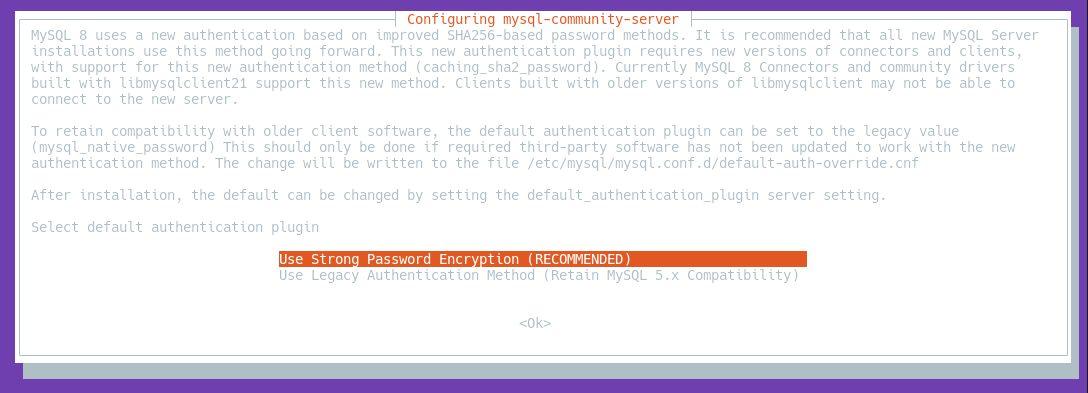
Utilizamos la opción Strong Password Encryption.
Tras esto, los paquetes seleccionados se instalarán y ya tendremos disponible MySQL en nuestro servidor. Podemos iniciarlo al arranque:
systemctl enable --now mysqlSecurizando MySQL
Un proceso muy recomendado para MySQL es ejecutar el siguiente comando para securizarlo:
mysql_secure_installationEsta es la salida del comando y sus respuestas:
Securing the MySQL server deployment.

Enter password for user root:
The 'validate_password' component is installed on the server.
The subsequent steps will run with the existing configuration
of the component.
Using existing password for root.

Estimated strength of the password: 100
Change the password for root ? ((Press y|Y for Yes, any other key for No) : No

 ... skipping.
By default, a MySQL installation has an anonymous user,
allowing anyone to log into MySQL without having to have
a user account created for them. This is intended only for
testing, and to make the installation go a bit smoother.
You should remove them before moving into a production
environment.

Remove anonymous users? (Press y|Y for Yes, any other key for No) : Y
Success.


Normally, root should only be allowed to connect from
'localhost'. This ensures that someone cannot guess at
the root password from the network.

Disallow root login remotely? (Press y|Y for Yes, any other key for No) : Y
Success.

By default, MySQL comes with a database named 'test' that
anyone can access. This is also intended only for testing,
and should be removed before moving into a production
environment.


Remove test database and access to it? (Press y|Y for Yes, any other key for No) : Y
 - Dropping test database...
Success.

 - Removing privileges on test database...
Success.

Reloading the privilege tables will ensure that all changes
made so far will take effect immediately.

Reload privilege tables now? (Press y|Y for Yes, any other key for No) : Y
Success.

All done!
Comprobación de la instalación
Como último paso, podemos revisar que la instalación ha sido correcta conectando a MySQL con el usuario root:
mysql -u root -pLa salida tras poner la contraseña:
Welcome to the MySQL monitor.  Commands end with ; or \g.
Your MySQL connection id is 12
Server version: 8.0.31 MySQL Community Server - GPL

Copyright (c) 2000, 2022, Oracle and/or its affiliates.

Oracle is a registered trademark of Oracle Corporation and/or its
affiliates. Other names may be trademarks of their respective
owners.

Type 'help;' or '\h' for help. Type '\c' to clear the current input statement.

mysql>
También podemos comprobar la versión que tenemos ejecutando esta consulta:
mysql> SELECT VERSION();
+-----------+
| VERSION() |
+-----------+
| 8.0.31    |
+-----------+
1 row in set (0.00 sec)


Comentarios